
Listen, if you’ve been building a SaaS app with OpenSaaS and Wasp , you’ve probably hit that point where you need to actually deploy the thing. Sure, you could throw it on Fly.io or Railway and call it a day, but what if you want to OWN your infrastructure?
That’s where Coolify comes in. It’s basically your own personal Heroku that you self-host. Pair it with a cheap VPS from Hetzner, and you’ve got yourself a deployment setup that’ll cost you a fraction of what you’d pay elsewhere.
I recently went through this whole process for one of my projects, so let’s get into it!
This guide was heavily adapted from infomiho’s excellent gist , but I’ve added a bunch of stuff I learned along the way.
Before We Start: Cloudflare DNS Gotcha
If you’re using Cloudflare (and you probably should be), here’s something that tripped me up. When you’re first setting everything up, make sure your DNS records are set to DNS only (the gray cloud, not the orange proxy). You can turn the proxy back on AFTER you’ve got everything working, but trying to do it from the jump will cause SSL headaches.
Also, make sure your SSL setting in Cloudflare is set to Full in the SSL overview screen. Trust me on this one.
Step 1: Set Up Your GitHub Container Registry Key
Coolify needs to pull your Docker images from somewhere, and we’re going to use GitHub’s Container Registry (ghcr.io) for that. This means you need to create a Personal Access Token (PAT) that has the right permissions.
Head over to GitHub:
- Profile > Settings > Developer Settings > Personal Access Tokens > Tokens (classic)
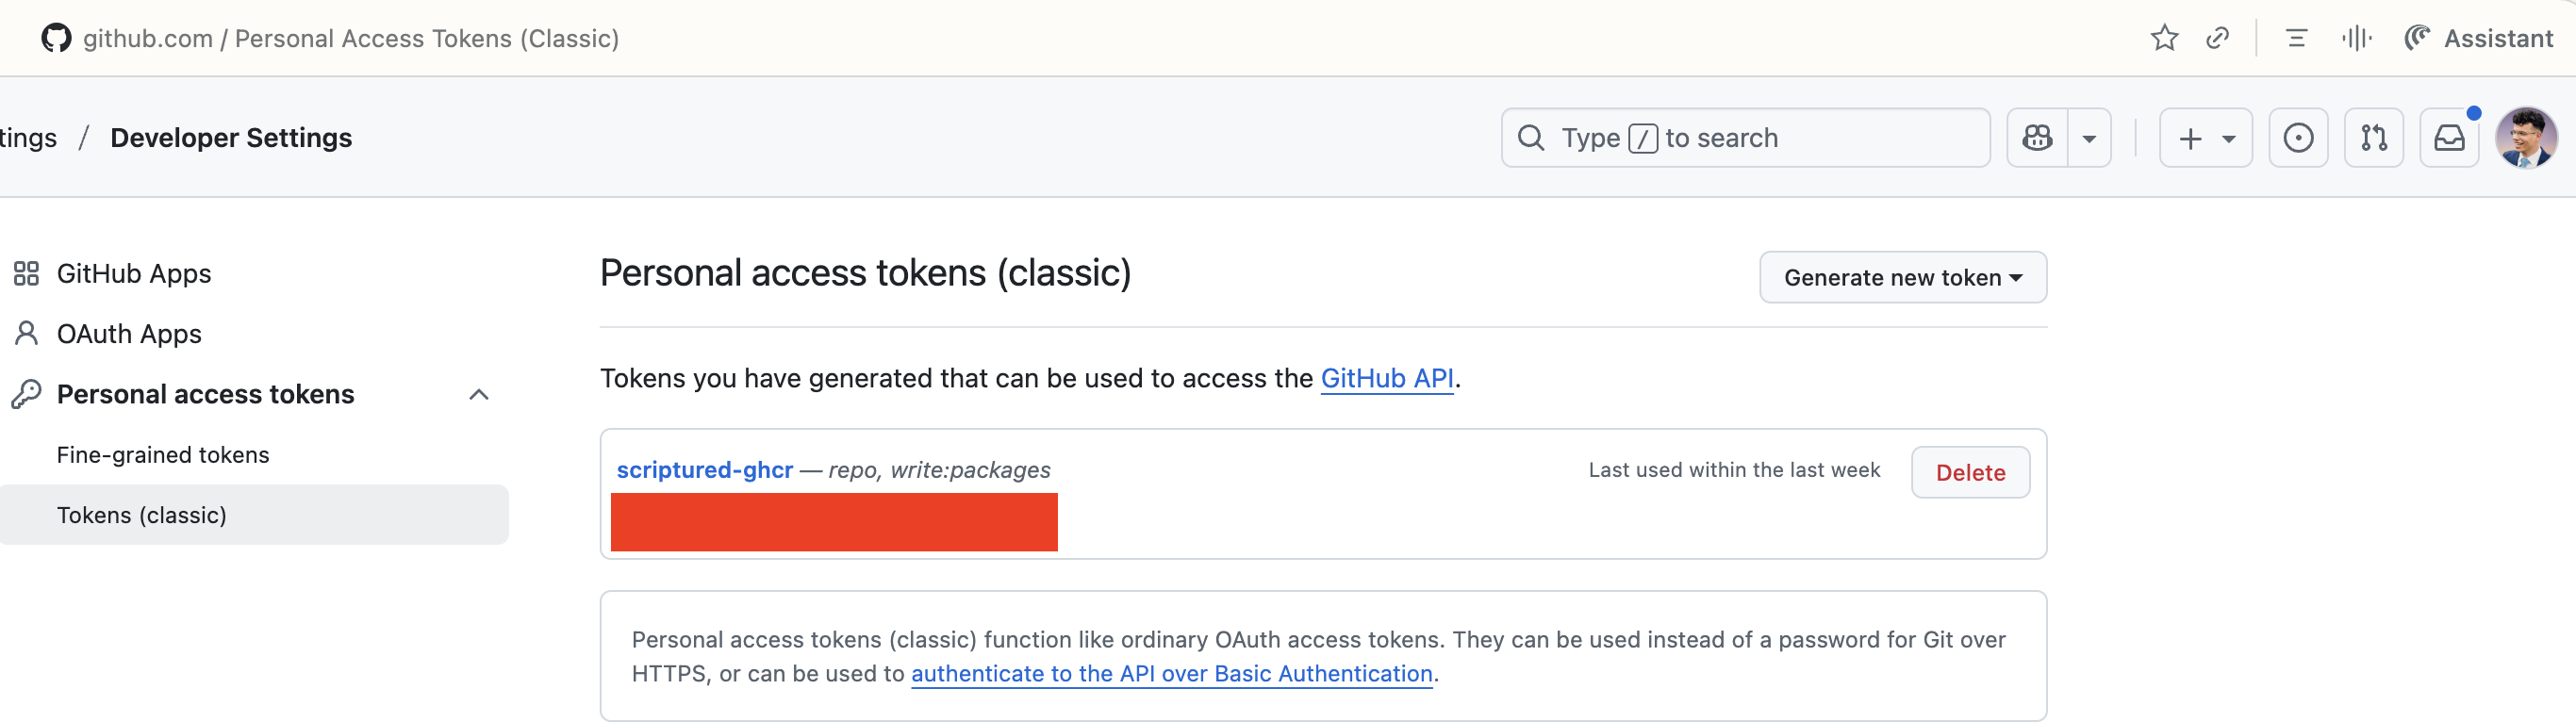 GitHub PAT Settings
 Make sure the PAT you generate has repo and write:packages enabled. You’ll need both.
Now SSH into your server (I’m using Hetzner) and run the Docker login command:
docker login ghcr.io
Enter your GitHub username and the PAT when prompted.
If you’d rather do it through the Coolify console, that works too:
- Go to Servers in Coolify
- Click on your server
- Under the Terminal tab, click Connect
- Run
docker login ghcr.io - Enter your GitHub username and PAT
Step 2: Create the GitHub Actions Workflow
In your project, create a deploy.yml file in the .github/workflows folder:
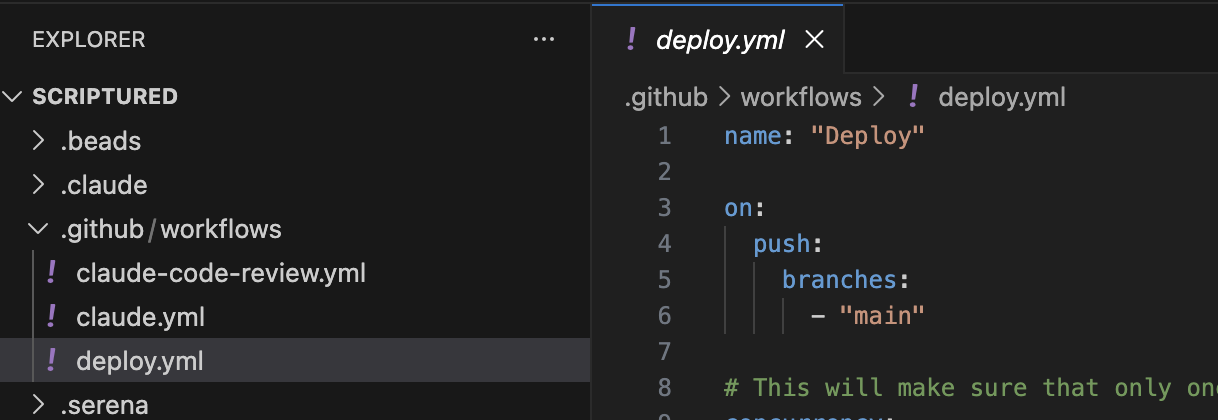 Deploy.yml in folder
 Here’s the workflow file. You’ll need to modify a few things to match your setup:
name: "Deploy"

on:
  push:
    branches:
      - "main"

# This will make sure that only one deployment is running at a time
concurrency:
  group: deployment
  cancel-in-progress: true

env:
  WASP_VERSION: "0.18.0"
  # Put your server app name here
  SERVER_APP_NAME: "BACKENDAPPNAME"
  # After you know the server URL, put the URL here
  SERVER_APP_URL: "https://api.YOURAPPHERE"
  # Put your client app name here
  CLIENT_APP_NAME: "FRONTENDAPPHERE"
  DOCKER_REGISTRY: "ghcr.io"
  DOCKER_REGISTRY_USERNAME: ${{ github.repository_owner }}
  # This secret is provided by GitHub by default
  DOCKER_REGISTRY_PASSWORD: ${{ secrets.GITHUB_TOKEN }}

jobs:
  build-and-push-images:
    permissions:
      contents: read
      packages: write

    runs-on: ubuntu-latest

    # REMOVE this whole block if your app is not in the `app` folder
    defaults:
      run:
        working-directory: ./app
    steps:
      - name: Checkout repository
        uses: actions/checkout@v4
      - name: Set up Node.js
        uses: actions/setup-node@v4
        with:
          node-version: '22.12.0'
      - name: Log in to the Container registry
        uses: docker/login-action@v3
        with:
          registry: ghcr.io
          username: ${{ env.DOCKER_REGISTRY_USERNAME }}
          password: ${{ env.DOCKER_REGISTRY_PASSWORD }}
      - name: (server) Extract metadata for Docker
        id: meta-server
        uses: docker/metadata-action@v5
        with:
          images: ${{ env.DOCKER_REGISTRY }}/${{ env.DOCKER_REGISTRY_USERNAME }}/${{ env.SERVER_APP_NAME }}

      - name: (client) Extract metadata for Docker
        id: meta-client
        uses: docker/metadata-action@v5
        with:
          images: ${{ env.DOCKER_REGISTRY }}/${{ env.DOCKER_REGISTRY_USERNAME }}/${{ env.CLIENT_APP_NAME }}

      - name: Install Wasp
        shell: bash
        run: curl -sSL https://get.wasp.sh/installer.sh | sh -s -- -v ${{ env.WASP_VERSION }}

      - name: Build Wasp app
        shell: bash
        run: wasp build

      - name: (client) Build
        shell: bash
        run: |
          cd ./.wasp/build/web-app
          REACT_APP_API_URL=${{ env.SERVER_APP_URL }} npm run build

      - name: (client) Prepare the Dockerfile
        shell: bash
        run: |
          cd ./.wasp/build/web-app
          echo "FROM pierrezemb/gostatic" > Dockerfile
          echo "CMD [\"-fallback\", \"index.html\", \"-enable-logging\"]" >> Dockerfile
          echo "COPY ./build /srv/http" >> Dockerfile

      - name: (server) Build and push Docker image
        uses: docker/build-push-action@v6
        with:
          # REMOVE the `app` bit from the path if your app is not in the `app` folder
          context: ./app/.wasp/build
          file: ./app/.wasp/build/Dockerfile
          push: true
          tags: ${{ steps.meta-server.outputs.tags }}
          labels: ${{ steps.meta-server.outputs.labels }}

      - name: (client) Build and push Docker image
        uses: docker/build-push-action@v6
        with:
          # REMOVE the `app` bit from the path if your app is not in the `app` folder
          context: ./app/.wasp/build/web-app
          file: ./app/.wasp/build/web-app/Dockerfile
          push: true
          tags: ${{ steps.meta-client.outputs.tags }}
          labels: ${{ steps.meta-client.outputs.labels }}

      - name: Trigger Deploy Webhooks
        env:
          CLIENT_COOLIFY_WEBHOOK: ${{ secrets.CLIENT_COOLIFY_WEBHOOK }}
          SERVER_COOLIFY_WEBHOOK: ${{ secrets.SERVER_COOLIFY_WEBHOOK }}
          COOLIFY_TOKEN: ${{ secrets.COOLIFY_TOKEN }}
        run: |
          curl "${{ env.CLIENT_COOLIFY_WEBHOOK }}" --header 'Authorization: Bearer ${{ env.COOLIFY_TOKEN }}'
          curl "${{ env.SERVER_COOLIFY_WEBHOOK }}" --header 'Authorization: Bearer ${{ env.COOLIFY_TOKEN }}'
Important notes:
- If your Wasp app isn’t in an
appsubfolder, remove all the./appprefixes from the paths - Make sure
WASP_VERSIONmatches what you’re using locally - The
SERVER_APP_NAMEandCLIENT_APP_NAMEshould match what you set up in Coolify (we’ll get to that next)
Step 3: Set Up Coolify Resources
Both your frontend and backend should be GitHub Image resources in Coolify. Make sure the Docker image tag is main to match what’s in your deploy.yml.
The Docker image name format is: ghcr.io/your-github-username/name-of-coolify-resource
This needs to match the SERVER_APP_NAME and CLIENT_APP_NAME in your workflow file.
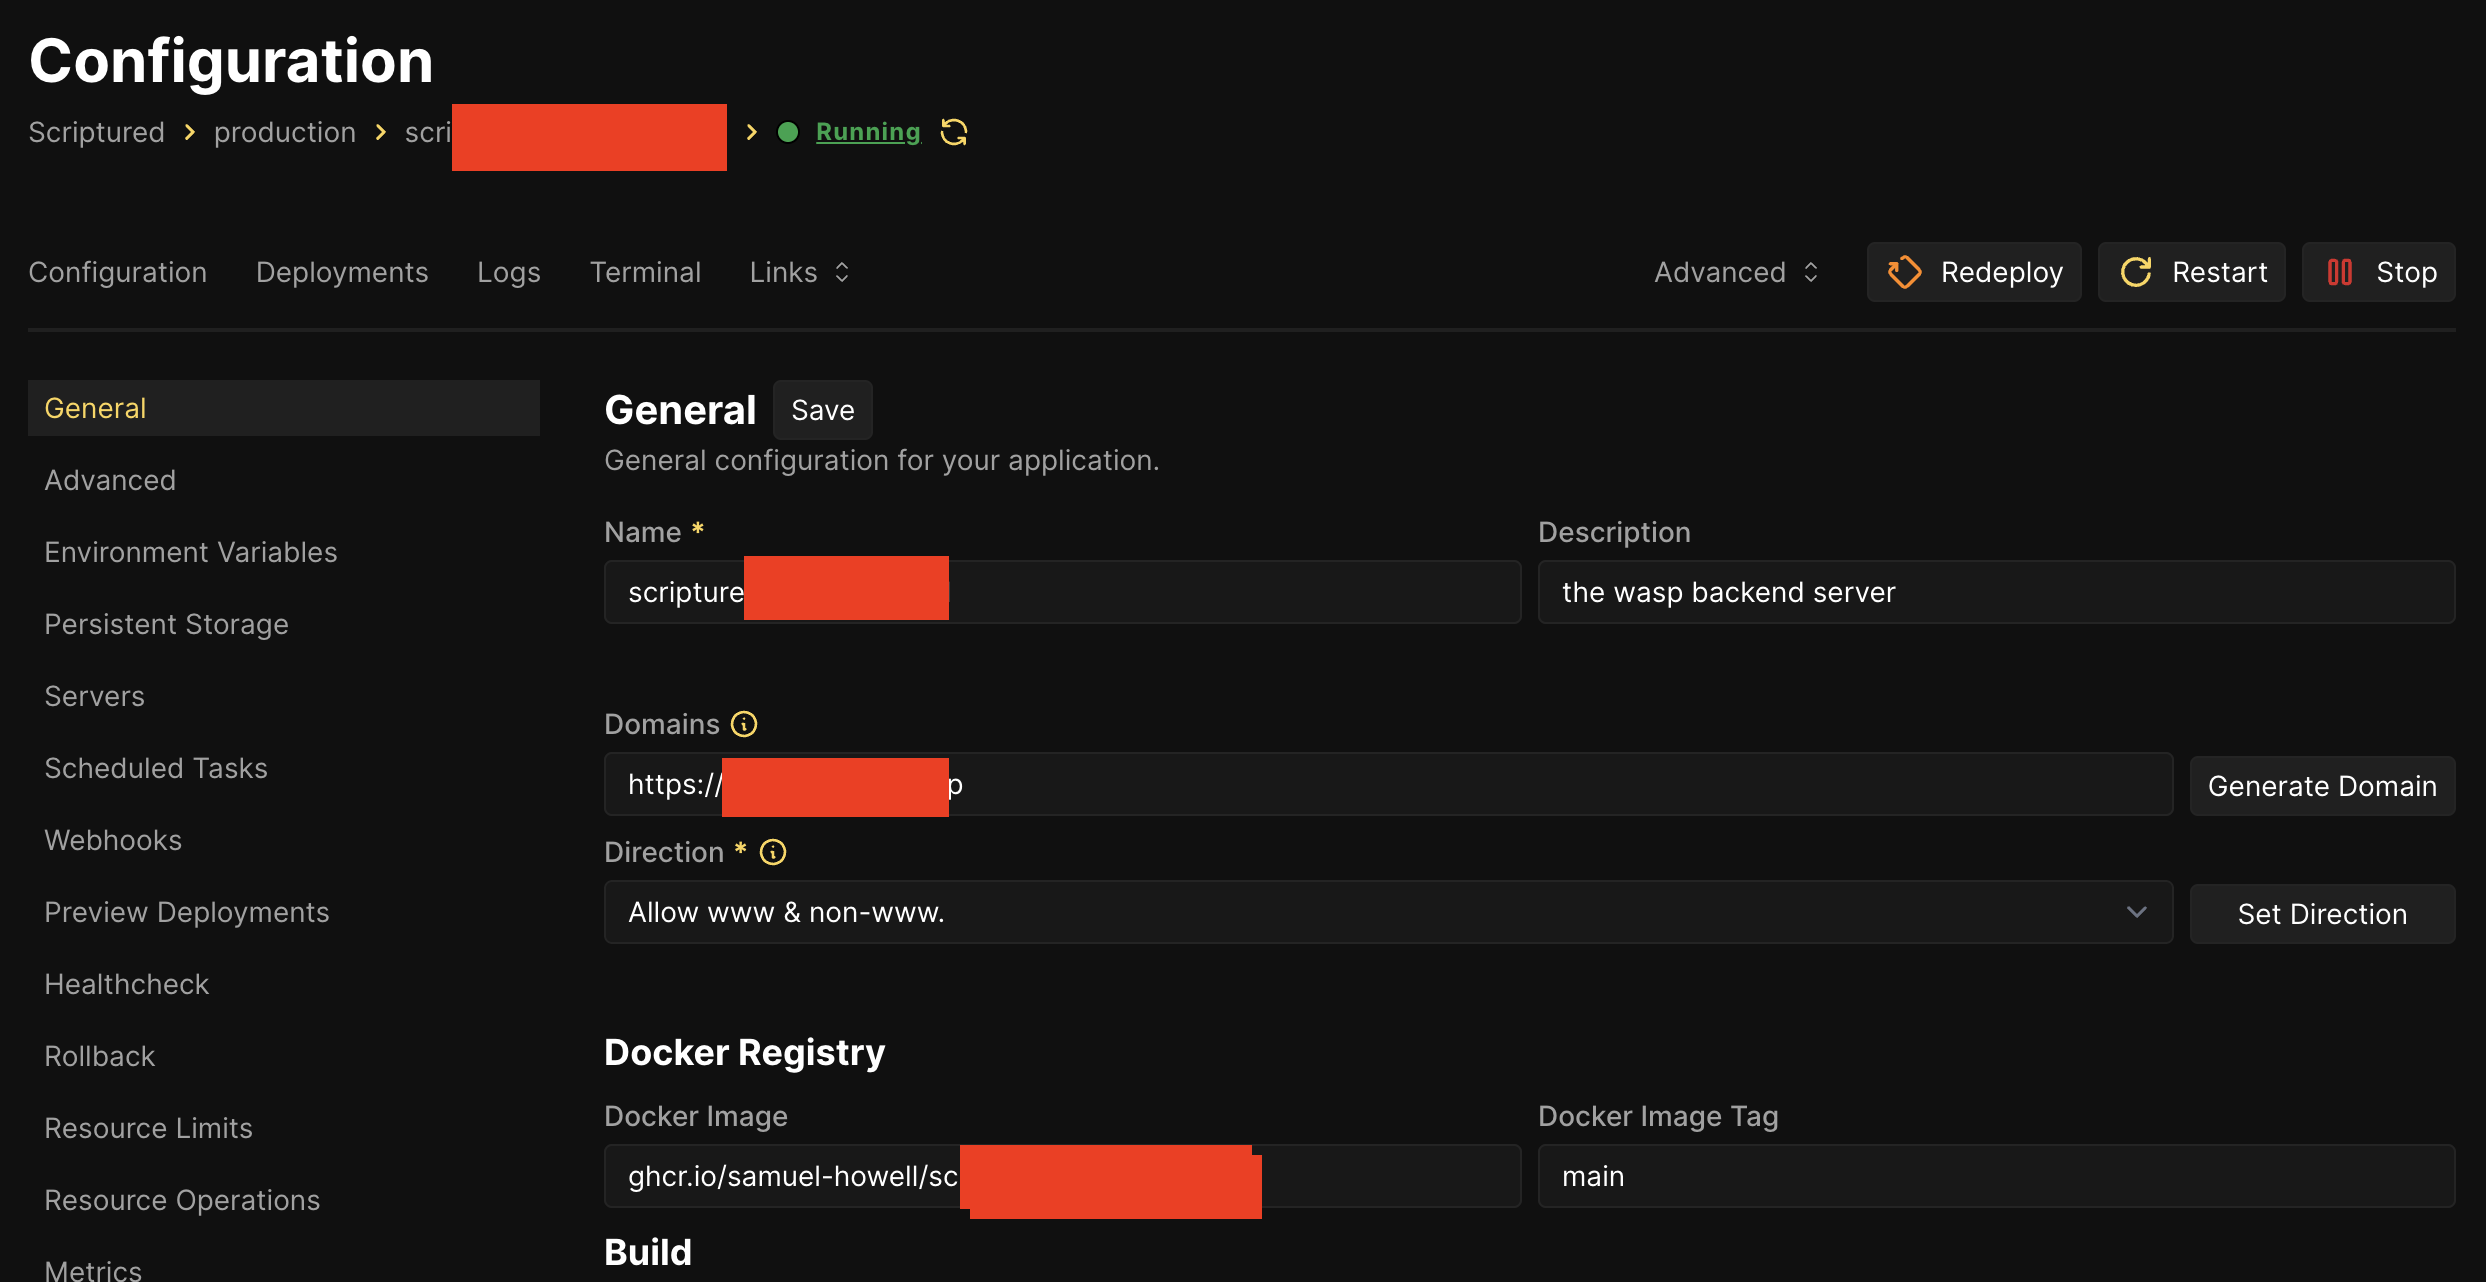 Coolify Resource Setup
 Do the same for your client resource.
Quick tip: The frontend doesn’t need a health check, but the backend can have one.
Step 4: Create a Coolify API Token
You’ll need an API token with root permissions for the GitHub Actions to trigger deployments:
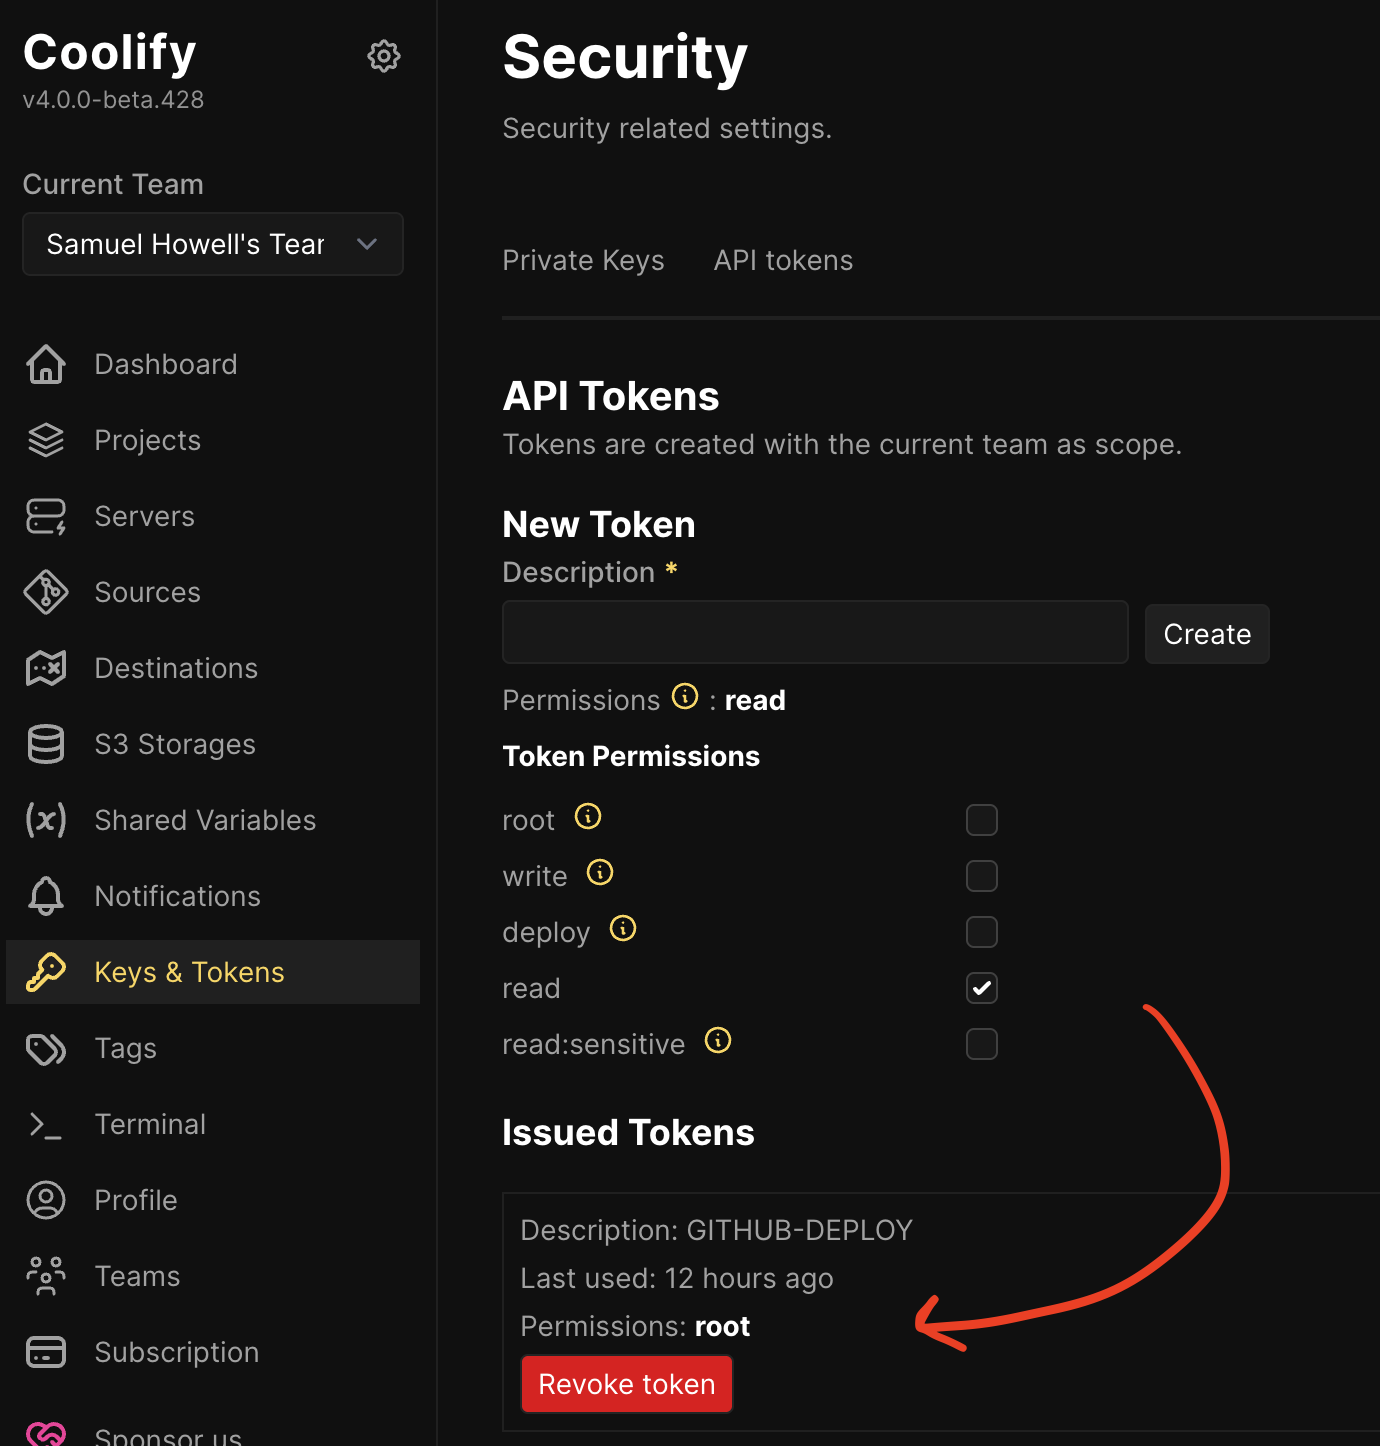 Coolify API Token
 Go to Settings > Keys & Tokens > API Tokens and create one with Root Access.
Step 5: Add Repository Secrets
Now we need to add all our secret tokens to GitHub. Go to your repository Settings > Secrets and variables > Actions.
Add these three secrets:
-
SERVER_COOLIFY_WEBHOOK
- Go to your server app in Coolify
- Click Webhooks and copy the Deploy Webhook URL
-
CLIENT_COOLIFY_WEBHOOK
- Go to your client app in Coolify
- Click Webhooks and copy the Deploy Webhook URL
-
COOLIFY_TOKEN
- Paste the API token you created in the previous step
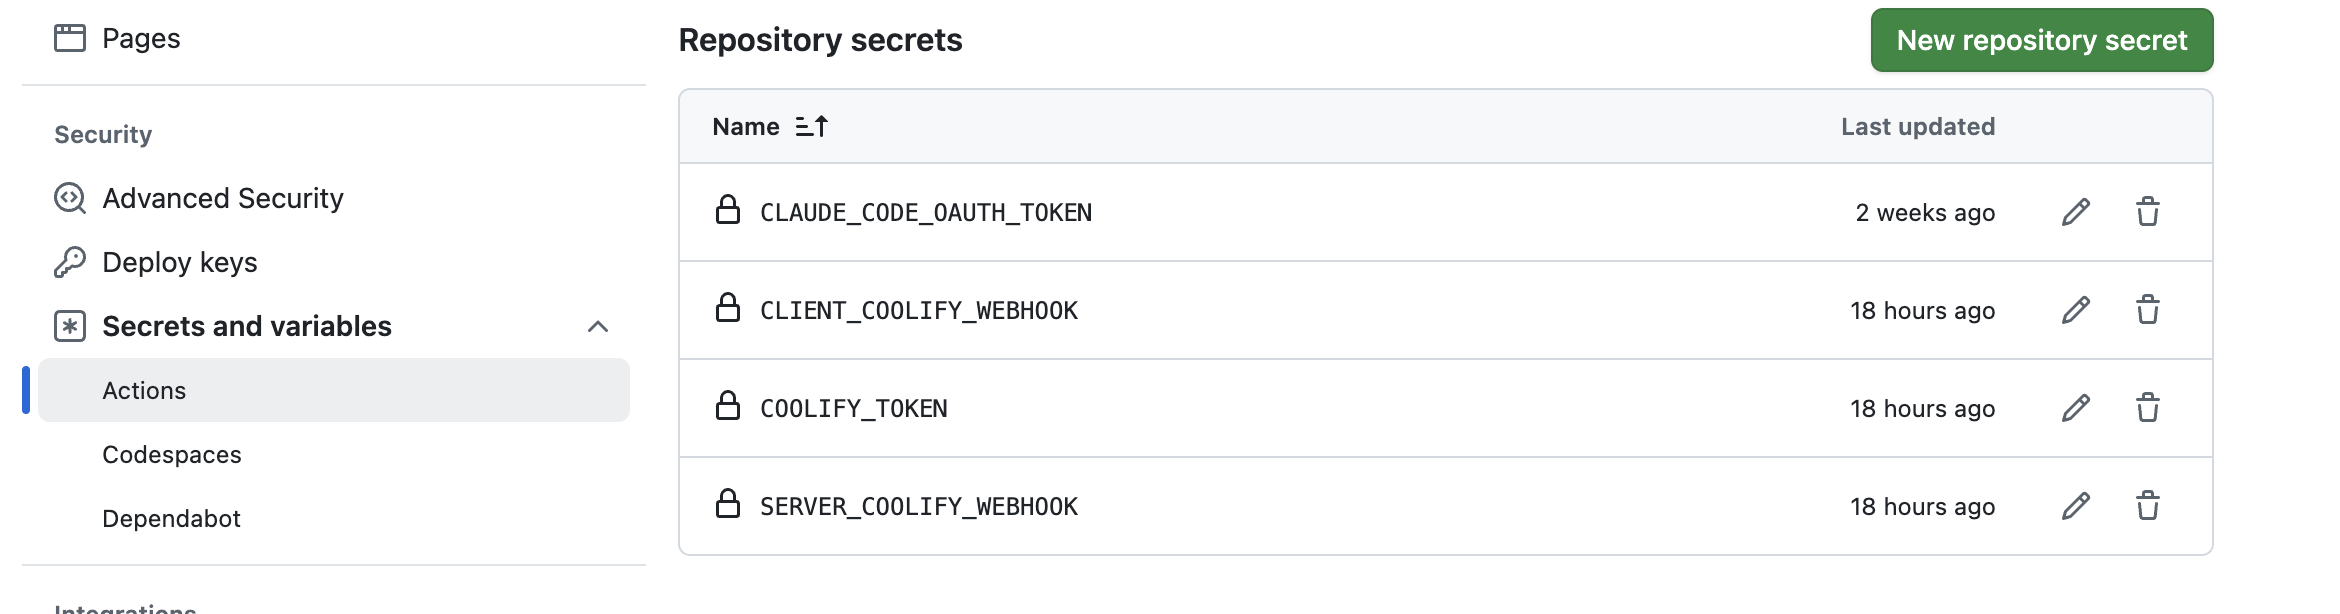 GitHub Repository Secrets
 Now when you push to main, you can watch the magic happen in your GitHub Actions tab!
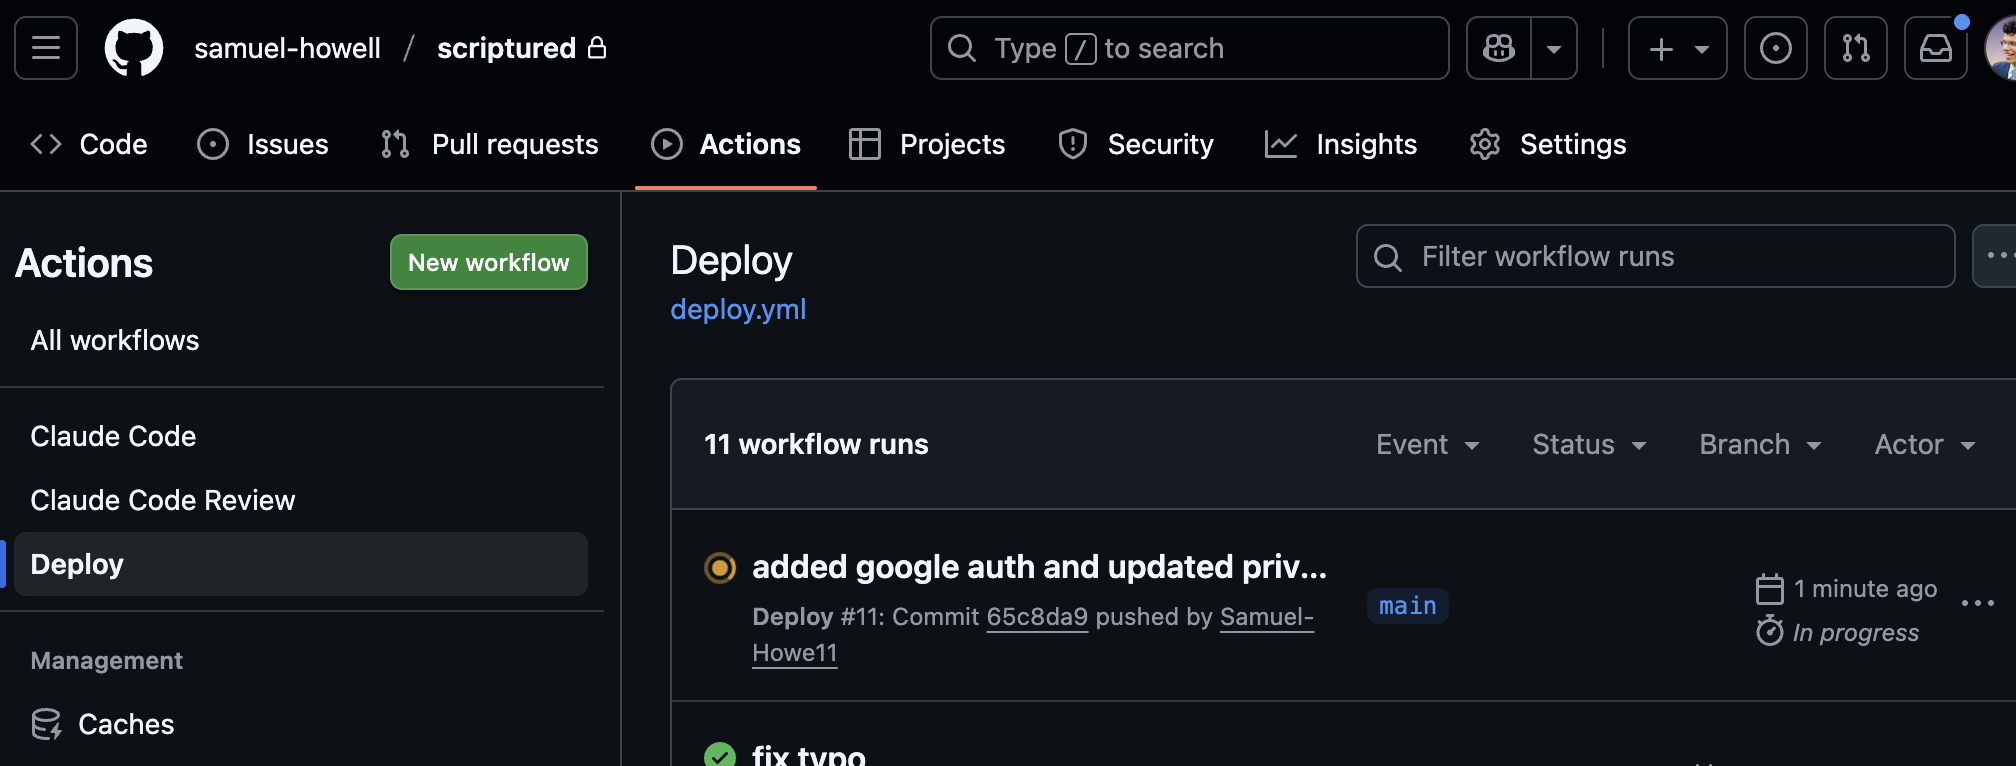 GitHub Actions Running
 Setting Up Google OAuth
If you’re using Google authentication (and you probably are with OpenSaaS), there’s some extra hoops to jump through.
First, you need to verify site ownership in Google Search Console . Google will add a TXT record to your DNS (Cloudflare if you’re following along). You can verify the TXT record propagated using Google’s dig tool .
Then you need to make sure your site complies with Google’s OAuth guidelines :
- Privacy policy and Terms of Service pages must be linked on your homepage
- Your homepage must be on a verified domain you own
- The homepage must accurately represent your app
- It can’t be JUST a login page - there needs to be actual content
- The privacy policy link must match what you put in your OAuth consent screen
I used Perplexity to check if my privacy policy included all the required wording about Google user data handling. Here’s what you need to cover:
The Privacy Policy must disclose how your app accesses, uses, stores, and/or shares Google user data. Your use of Google user data must conform with Google’s Limited use requirements.
When you’re ready to go live, you’ll need to hit “Publish App” in the Google Cloud Console to start the verification process.
Seeding Your Production Database
Okay Sam, I’ve got everything deployed. Now how do I seed my prod database?
I got you. The trick is SSH tunneling from your local machine to the production database running inside a Docker container on your Coolify server.
Here’s the command that worked for me:
ssh -L 5432:<DOCKER_CONTAINER_IP>:5432 root@<YOUR_SERVER_IP>
CRITICAL: Make sure you don’t have a local dev instance running on port 5432 before you tunnel in, or you’ll get a connection failure.
If you also need to forward Typesense for seeding, you can chain the port forwards:
ssh -L 5432:<DOCKER_CONTAINER_IP>:5432 -L 8108:localhost:8108 root@<YOUR_SERVER_IP>
The <DOCKER_CONTAINER_IP> is the Docker container’s internal IP address. This can change when containers restart, so I created a helper script on my server to find the current addresses:
ssh root@<YOUR_SERVER_IP> '/root/db-tunnel.sh'
We’re in the age where code is quickly becoming ephemeral, so feel free to get Claude or Codex to spin something up for you if feel you need it.
What stays stable across redeploys:
- Container names (Coolify generates these based on database IDs)
- Database credentials (stored in Coolify)
- Database data (stored in Docker volumes)
What changes:
- IP addresses (Docker assigns these dynamically)
- Container IDs
Once your tunnel is active (keep that terminal window open!), update your .env.server to point to localhost:
DATABASE_URL=postgres://your-user:your-password@localhost:5432/your-database
Then run wasp db seed from your app folder.
WARNING: Comment out that DATABASE_URL after you’re done seeding! Otherwise your local dev environment will be hitting prod. Ask me how I know.
If you want to use the Prisma Studio GUI instead, run wasp db studio while the tunnel is active. You’ll get a nice interface at localhost:5555.
Setting Up Stripe Payments
You need separate webhook secrets for your test and production environments. The dev app should use the test webhook from Stripe’s developer settings, and production should use the production webhook.
Your Stripe webhook needs to listen for these events:
For local testing, you’ll need the Stripe CLI:
stripe login
stripe listen --forward-to localhost:3001/payments-webhook
This will give you a local webhook secret (starts with whsec_) that you can use for testing with the 4242 4242 4242 4242 test card.
Client-Side Environment Variables
Here’s something that bit me: since the Wasp client is a static React build, environment variables get baked in at build time. You can’t set them in Coolify’s runtime environment - they have to be set during the GitHub Actions build.
To add a client-side env var:
- Go to GitHub repo Settings > Secrets and variables > Actions
- Add a new secret like
REACT_APP_XXXXXX - Reference it in your
deploy.yml
Docker Hub Rate Limits
One more thing - I was getting random timeouts on Docker pulls. Turns out Docker Hub has rate limits for anonymous users. If you add Docker Hub credentials to your deploy.yml, you get 200 pulls every 6 hours instead of hitting the wall.
Deploy Workflow Summary
Here’s my typical workflow:
- Develop and test on dev branch
- Push to dev (deploys to dev environment)
- When ready, merge dev into main
- Push to main (deploys to production)
Quick PR from dev to main:
gh pr create --base main --head dev --title "Merge dev into main"
Alright, that’s the whole setup. Self-hosting your Wasp app on Coolify is pretty cool! You’ve got full control over your infrastructure, your data stays yours, and your monthly costs are predictable.
If you run into issues, the Wasp Discord is incredibly helpful. The community there is top-notch, and the Wasp team is super responsive. You can also hit me up on X if needed!
Happy deploying!